Lachha Paratha is incredibly versatile, making it the perfect accompaniment to various Indian dishes—from rich, aromatic curries and comforting dals to tangy pickles and refreshing chutneys.
In this comprehensive guide, we will delve into the secrets of making authentic Lachha Paratha at home. We’ll cover everything from preparing the ideal dough and mastering the intricate layering process to achieving that signature crispness on the tawa. Whether you’re a novice baker or an experienced cook, this guide will equip you with the knowledge and techniques to create restaurant-quality Lachha Paratha with ease, transforming your home meals into a truly gourmet experience.
Let’s get started!
What is Lachha Paratha?
Lachha Paratha is a highly distinguished and cherished variety of Indian flatbread, originating from the vibrant culinary traditions of North India. Its name, “Lachha,” is derived from the Hindi word for “coil” or “ring”, aptly describing the unique coiled shape it takes during preparation, which is fundamental to creating its defining characteristic: numerous visible, distinct layers.
About Lachha Paratha
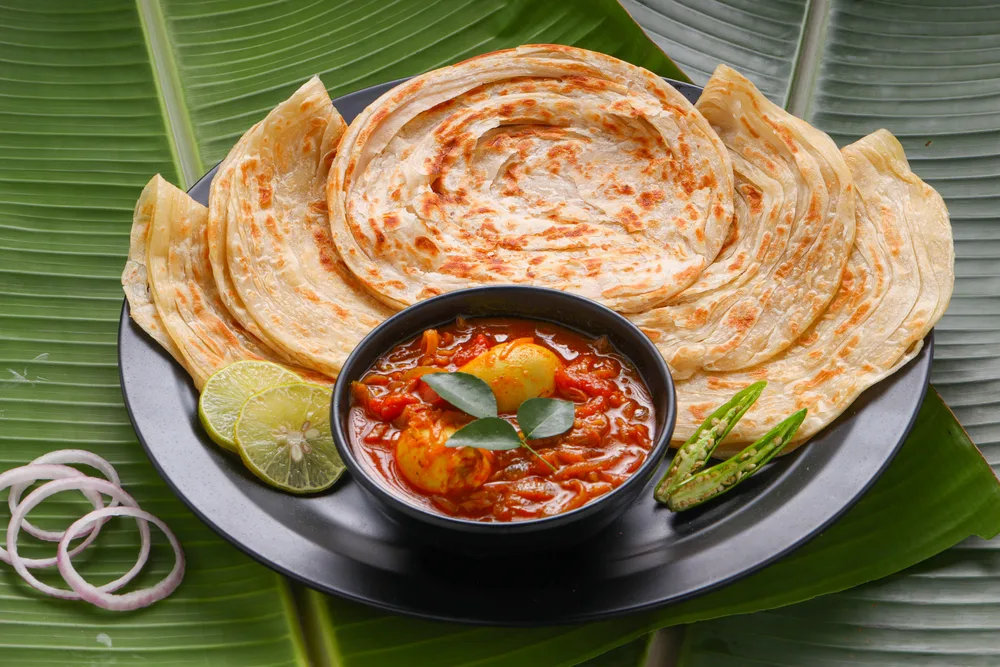
Lachha Paratha (also called Laccha Paratha or Layered Paratha) is a crispy, flaky, and multi-layered Indian flatbread made from whole wheat flour. “Lachha” means layers or coils. This paratha is known for its spiral, crispy layers and rich taste, often served with curries, dal, or curd.
PrintLachha Paratha recipe: Flaky & Layered Indian Flatbread
Ingredients
-
2 cups whole wheat flour (atta)
-
1 tbsp oil or ghee (for dough)
-
½ tsp salt
-
Warm water (as needed to knead the dough)
-
Extra flour for dusting
-
Ghee or oil (for cooking & layering)
Instructions
🔹 Step 1: Prepare the Dough
-
In a mixing bowl, combine flour, salt, and 1 tbsp oil/ghee.
-
Gradually add warm water and knead into a soft, smooth dough.
-
Cover and let it rest for 20–30 minutes.
🔹 Step 2: Roll & Create Layers
-
Divide dough into equal-sized balls.
-
Roll one ball into a thin circle (as thin as possible).
-
Apply ghee/oil evenly and dust lightly with dry flour.
-
Start pleating the dough (like a fan or paper accordion).
-
Roll the pleated dough into a coil (like a cinnamon roll).
-
Flatten slightly and roll again into a thick disc (don’t press too hard to preserve layers).
🔹 Step 3: Cook the Paratha
-
Heat a tawa or skillet on medium flame.
-
Place the rolled paratha on the hot tawa.
-
Cook one side for 30–40 seconds, flip and apply ghee/oil.
-
Cook both sides, pressing gently, until golden brown and crispy with visible layers.
Notes
Serve hot with:
-
Paneer butter masala
-
Dal makhani
-
Chole
-
Raita or curd
-
Pickle and butter
Tips for Perfect Lachha Paratha
-
Use warm water for softer dough.
-
Don’t skip resting the dough—it helps with elasticity.
-
Apply enough ghee while pleating to get distinct layers.
-
Cook on medium heat to ensure layers crisp up without burning.
-
Lachha Paratha Ingredients
The classic Lachha Paratha is prepared using a simple dough made from flour (all-purpose, whole wheat, or a mix), water, and salt. The key to its signature flaky layers is the generous application of a fat, such as ghee or oil, which is spread between the folds of the dough. A pinch of sugar is sometimes added for flavor and to aid in browning. These basic ingredients are layered and coiled to create its unique, crisp texture.
You only need a few basic ingredients to make this delicious bread:
- 2 cups whole wheat flour (atta)
- 1 tbsp ghee or oil
- ½ tsp salt
- Water (as needed for kneading)
- Extra ghee or oil for brushing and cooking
Lachha Paratha Recipe
Lachha Paratha is a beloved North Indian flatbread, renowned for its crispy, flaky layers and rich, ghee-infused flavor. If you’re looking to recreate this restaurant-style bread at home, this Lachha Paratha recipe is just what you need. It’s simple, delicious, and perfect with any curry or chutney.
How to Make Lachha Paratha
1. Prepare the Dough (The Foundation of Flakiness)
This initial step is crucial for soft, pliable dough that can be easily layered.
- Combine Dry Ingredients: In a large mixing bowl, combine 2 cups whole wheat flour (atta) and ½ tsp salt. Mix them well using your hands.
- Add Fat: Add 1 tbsp ghee or oil to the flour mixture. Using your fingertips, rub the ghee or oil into the flour thoroughly until the mixture resembles coarse breadcrumbs and no lumps of fat remain. This step helps in making the parathas soft and aids in layering.
- Knead with Water: Gradually add water, a little at a time, and start kneading the dough. Continue to add water as needed until you form a soft, pliable, and smooth dough. It should be neither sticky nor too stiff.

Important: Knead the dough vigorously for at least 5-7 minutes. This develops the gluten, making the dough elastic and easy to roll very thin.
- Rest the Dough: Gather the kneaded dough into a ball. Lightly coat the surface of the dough ball with a few drops of oil or ghee to prevent it from drying out. Cover the bowl with a clean kitchen cloth or plastic wrap and let the dough rest at room temperature for at least 20 minutes. Resting allows the gluten to relax, making the dough much easier to roll thinly and preventing it from snapping back.
2. Divide, Roll & Layer (The Heart of Lachha)
This is where the magic of “lachha” begins.
Divide Dough: Gently punch down the rested dough to release any trapped air. Divide the dough into 6-8 equal portions and roll each portion into a smooth ball.

- Prepare Work Surface: Lightly dust your rolling surface (a clean counter or a large rolling board) and your rolling pin with a very small amount of dry whole wheat flour. Alternatively, you can oil your surface lightly instead of using flour.
- Roll into a Thin Circle: Take one dough ball. Using your rolling pin, roll it out into a very thin, large circle (as thin as you can get it without tearing). Aim for a diameter of about 8-10 inches, like a thin chapati. The thinner you roll, the more distinct layers you’ll achieve.
- Brush Generously with Ghee: Liberally brush the entire surface of the thinly rolled dough with extra ghee or oil. Ensure it’s coated evenly.
- Sprinkle Flour (Optional but Recommended): Lightly sprinkle a very thin layer of dry flour over the ghee-brushed surface. This helps further in layer separation.
Fold into a Fan/Pleat: Carefully start folding the dough from one end, creating tight, narrow pleats (like an accordion or a paper fan). Fold it back and forth until the entire circle is pleated into a long strip.

- Coil the Strip: Gently stretch the pleated strip a little to lengthen it. Then, starting from one end, coil the strip tightly into a spiral or a snail shell shape. Tuck the very end of the strip underneath the coil to secure it.
- Rest Coiled Dough (Optional but Recommended): Once all dough balls are coiled, cover them again with a damp cloth and let them rest for another 10-15 minutes. This relaxes the layers, making them easier to flatten without them tearing or fusing.
3. Roll Again & Cook (Bringing the Lachha to Life)
The final rolling and cooking step reveals the layers.
Gently Flatten Coils: Take one coiled dough ball. Place it on your lightly dusted (or oiled) rolling surface. Gently, with light and even pressure, roll it out again into a round paratha of about 6-7 inches in diameter. Do not press too hard or roll too vigorously, as this can flatten the layers. The aim is to flatten it enough for cooking while retaining the layered structure.

- Heat the Tawa: Place a heavy-bottomed tawa (flat griddle or heavy-bottomed frying pan) on medium-high heat. Allow it to heat thoroughly for 2-3 minutes.
- Place Paratha: Once the tawa is hot, carefully place one rolled Lachha Paratha onto the hot surface.
- Initial Cook: Cook for about 30 seconds to 1 minute until you see small bubbles appearing on the surface and the dough looks slightly cooked.
- Apply Ghee & Flip: Drizzle about ½ to 1 teaspoon of extra ghee or oil over the surface of the paratha. Flip the paratha using a spatula.
- Cook Second Side: Cook the second side for another 1-2 minutes, pressing gently with the spatula (especially around the edges) to ensure even cooking and encourage the layers to puff up.
- Apply Ghee & Flip Again: Drizzle another ½ to 1 teaspoon of extra ghee or oil on the second side. Flip the paratha again.
- Cook Until Golden & Crispy: Continue cooking for another 1-2 minutes, pressing gently, until both sides of the paratha are beautifully golden brown with distinct crispy spots. You should observe the layers separating as it cooks.
- Crush (Optional, for more visible layers): Once cooked, remove the Lachha Paratha from the tawa. While still hot, gently crush it between your palms (like clapping it between your hands) a few times. This helps separate and fluff up the layers, making them more visible and enjoyable. Be careful, as it will be very hot.
- Serve Hot: Serve the Lachha Paratha immediately. Repeat the cooking process for the remaining parathas.

Cook on Tawa: Cook on medium heat, pressing lightly until golden brown on both sides.
Types of Lachha Paratha
Lachha Paratha is a popular Indian flatbread known for its layered, flaky texture. Beyond the classic version, it comes in various types, including flavored options like Pudina (mint) and stuffed versions like Aloo (potato), each offering a unique twist to the traditional bread.
1]Garlic Butter Lachha Paratha:
Description: A highly aromatic and intensely flavored twist, perfect for garlic lovers.
Preparation: After rolling out the thin dough circle and before brushing with ghee, spread a thin layer of minced fresh garlic mixed with soft butter (or ghee) over the surface. Then proceed with the fan-folding and coiling. You can also sprinkle a little dried oregano or chili flakes.
Flavor Profile: Adds a pungent, savory garlic aroma and taste, significantly enhancing the paratha’s flavor.
Serving: Excellent with rich curries or even as a standalone savory bread.
2]Tawa Lachha Paratha:
Description: This term simply emphasizes that the paratha is cooked entirely on a flat griddle (tawa), which is the traditional and most common method.
Characteristics: Ensures even cooking, allowing the paratha to develop a uniform golden-brown color and consistent crispiness. The direct heat of the tawa is ideal for puffing up the layers.
Serving: The standard way to prepare and serve Lachha Paratha at home or in dhabas.
3]Frozen Lachha Paratha (Pre-made):
Description: This refers to commercially available, pre-made Lachha Parathas that are frozen for convenience.
Preparation: Simply take them out of the freezer and heat them directly on a hot tawa with a little oil/ghee until golden brown and crispy. No thawing needed.
Characteristics: Offers incredible ease and speed of cooking, making traditional Lachha Paratha accessible even on busy days.
Serving: Ideal for quick meals, busy mornings, or when you don’t have time for homemade dough. Many brands (like those mentioned in the prompt, or others like Haldiram’s, ITC Aashirvaad) offer these.
4]Onion Lachha Paratha:
Description: Incorporates the sweet and pungent crunch of finely chopped onions into the layered paratha.
Preparation: While folding the ghee-brushed, fan-pleated dough, you can sprinkle finely chopped onions and a pinch of finely chopped green chilies onto the surface before coiling. Alternatively, some recipes mix the finely chopped onions directly into the dough during kneading.
Characteristics: Adds a delightful textural contrast and a sharp, savory flavor from the onions, along with a subtle heat from the chilies.
Serving: A very popular and flavorful variation, often served simply with yogurt or pickle.
5]Readymade Lachha Paratha (Commercial Offerings):
Description: This refers specifically to brands offering pre-packaged, frozen Lachha Parathas for easy home cooking. The prompt mentions “Wheat Parota” and “Malabar Parota” as part of a range, indicating a variety within the ready-to-cook category.
Key Features:
Quick & Easy to Cook: Typically takes minutes to heat on a tawa.
Perfectly Layered & Flaky: Designed to replicate homemade texture.
No Compromise on Taste or Quality: Aims for authentic flavor.
Ideal for Busy Lifestyles: Convenience is a major selling point.
Examples: Brands like “Wheat Parota” (implies whole wheat based, potentially closer to North Indian Lachha) and “Malabar Parota” (suggests a flakier, richer version from Kerala, which also has layered parathas, though typically thinner than Bun Parotta).
Availability: Widely available in supermarkets, allowing consumers to “taste the tradition with a modern twist.”
Buy Lachha Paratha Pack
Lachha Paratha Recipe – Quick Summary
Lachha Paratha is a quintessential North Indian and Pakistani flatbread, renowned for its distinct flaky, multi-layered texture and rich, buttery taste.
Signature Creation: Its unique texture is achieved by a specific technique of rolling the dough thinly, brushing with ghee/oil, fan-folding, and then coiling it into a spiral before gently flattening and cooking.
Key Features:
Texture: Delivers a delightful contrast—crispy and golden on the outside, yielding to a soft, tender, and distinctly flaky interior.
Preparation: The dough is meticulously rolled, folded into pleats (like an accordion), coiled, and then gently re-rolled.
Cooking Method: Traditionally cooked on a tawa (flat griddle) with a generous application of ghee or oil to enhance its crispness and flavor.
Serving Versatility: Best enjoyed hot and fresh. It’s an ideal accompaniment for a vast range of Indian dishes, including rich curries, comforting dals, savory vegetable preparations, or even simpler pairings like cool yogurt, tangy pickles, or sweet dishes like halwa for an unconventional but delicious contrast.
Culinary Status: A beloved staple in home kitchens, a signature item in dhabas (roadside eateries), and a popular choice in restaurants, offering a delicious, buttery, and texturally complex alternative to plainer rotis or naan.
What is Lachha Paratha – FAQ
Lachha Paratha is generally not considered a healthy food for regular consumption. Its signature flaky layers require a significant amount of oil or ghee, making it high in calories and fat. While a whole wheat version offers fiber, it is a calorie-dense food best enjoyed as an occasional treat rather than a daily staple.
Yes, you absolutely can make Lachha Paratha using oil instead of ghee. While the essence of traditional Lachha Paratha is often tied to the rich flavor and aroma of ghee, oil is a perfectly viable substitute, especially if you have dietary restrictions (e.g., dairy-free) or prefer a different fat profile.
Yes, you can store leftover Lachha Paratha, and it reheats quite well, especially if stored properly. This makes them a great option for meal prep or enjoying later.
Lachha Paratha’s flaky texture and rich, buttery flavor make it incredibly versatile, pairing beautifully with a wide range of savory Indian dishes. The best side dishes are typically those with a good amount of gravy or a contrasting texture and flavor profile.